Thursday, May 29, 2014

Perfect Popcorn


Popcorn is literally (and I mean literally) one of my favorite foods in the whole world. I'm one of those people who takes the popcorn bag home from the theater rather than waste a single precious piece of popcorn.

I've always really loved homemade popcorn as well, but it usually required some kind of bulky, frivolous contraption. Then I discovered a super easy way to make the most delicious popcorn ever. While this hasn't helped my popcorn addiction at all, it has helped me make some new friends – not to mention the cupboard space it has freed up.

Perfect Popcorn
½ c popcorn kernels
¼ c canola oil
2-3 tbsp. butter
salt, to taste
Large (6 qt) pot, with lid

Put kernels, oil, and butter in the pot & place on the stove. Turn temperature to high, and shake the pot back and forth continually while oil heats up & butter melts. Once the kernels start to pop, make sure to continue shaking the pot as the rest of the kernels pop. You will know the popcorn is done when the pot is nearly full and the popping begins to slow down. Remove from heat and let sit until kernels have stopped popping. Remove lid & pour popcorn into a large mixing bowl. Sprinkle with salt and mix with a spoon. Taste & add more salt until desired saltiness is achieved (I usually do 2-3 rounds of salt). 

Just for the record – I can eat this much popcorn by myself. You may want to make at least two batches if you're sharing.  


Adapted from original recipe here

Sunday, May 25, 2014

Carmelitas


This recipe is simply a no brainer. Easy [check]. Scrumptious [check]. Aesthetically pleasing [check]. Foolproof [check]. If you're looking for an easy way to impress your dinner party guests, handsome next-door neighbor, or your visiting-from-out-of-town relatives, look no further.

Carmelitas
32 caramel squares, unwrapped
1/2 c heavy cream
3/4 c butter, melted
3/4 c brown sugar, packed
1 c flour
1 c rolled oats
1 tsp baking soda
6 oz semisweet chocolate chips

1. Preheat oven to 350 degrees. Mix together butter, brown sugar, flour, oats, and baking soda until thoroughly combined. Pat 1/2 of the mixture into a greased 8x8 pan, and bake in the oven for 10 minutes.

2. While the crust is baking, combine caramels & heavy cream in a medium saucepan. Cook over low heat, stirring constantly, until completely smooth. Remove from heat.

3. Pull crust out of the oven and sprinkle with chocolate chips. Pour caramel mixture over chocolate chips, and crumble the rest of the oatmeal mixture over the top. Return to the oven for 15-20 minutes, until the edges are browned. Allow to cool completely before cutting (you can put it in the fridge if you need to serve quickly).

*To make a 9x13 pan, double ingredients.


Original recipe from Lulu The Baker

Monday, May 12, 2014

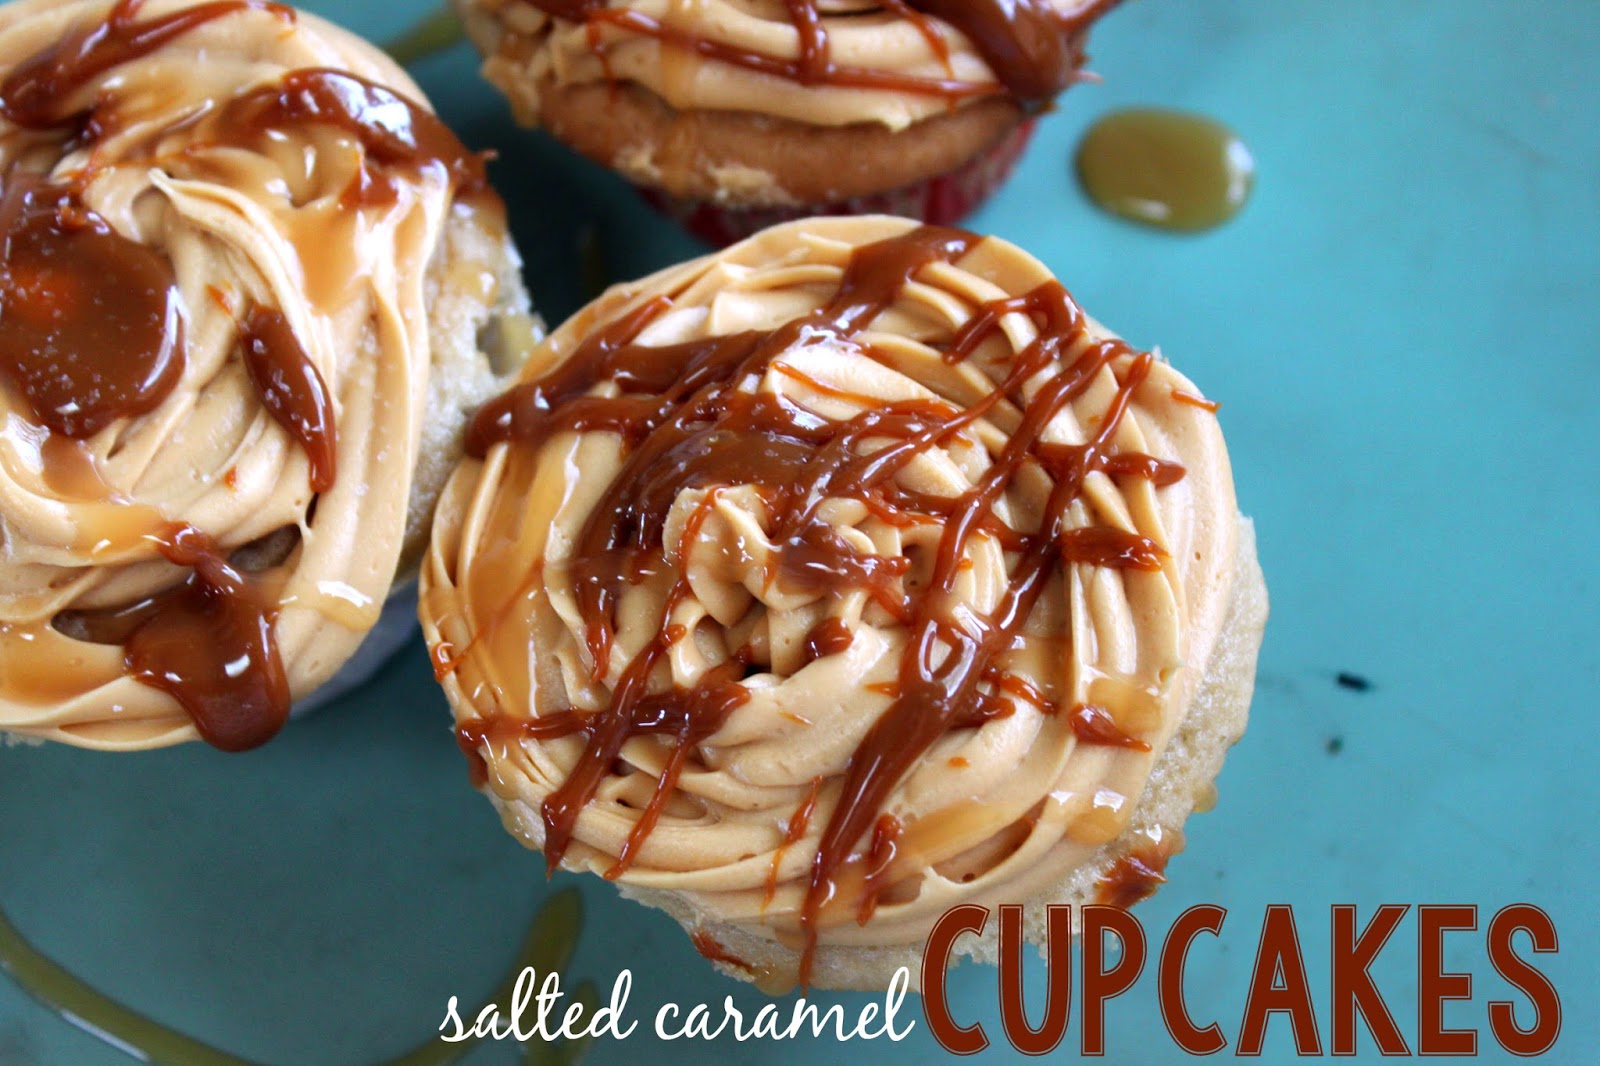
Salted Caramel Cupcakes


Okay, so I know salted caramel is super trendy right now - and with good reason. I know for me, personally, I just can't get enough of it. I'm the kind of person who doesn't like things too sweet (I know I'm mostly alone in this) - so I like to find the combination of sweet & savory perfect. Like Junior Mints in your movie theater popcorn (if you haven't tried this yet, please do so now).

Salted Caramel Cupcakes
Cupcakes:
1 box Betty Crocker butter pecan cake mix (if you can't find any, use yellow)
3 eggs
1 stick melted butter, cooled
1/2 c water
1/2 c caramel macchiato creamer (preferably Coffee-Mate brand)

Frosting:
1 pkg cream cheese, softened
2 cans Nestle dulce de leche caramel (Look in the hispanic aisle. See pic for reference.)
5-6 cups powdered sugar
1 stick butter, softened
Sea salt (make sure it's chunky)

1. Preheat oven to 325 degrees. Line cupcake pan with liners. Mix together all cupcake ingredients on low for one minute. Scrape sides, turn mixer to medium, and beat for 4 minutes.

2. Pour cupcakes into liners (somewhere between 1/2 and 2/3 full). Bake cupcakes for 20 minutes, or until a toothpick comes out clean. Let cool.

3. For the frosting - put the butter in the mixer and mix until smooth. Add cream cheese & cream until thoroughly combined. Add 1 can of caramel, and mix until combined. Add powdered sugar one cup at a time, and adjust amount according to your taste.

4. Frost cupcakes. (I like piping this frosting because not only is it pretty, you get more of it. And you're going to want more of this frosting.) Warm up the other can of caramel in a microwave-safe container, and use a spoon to drizzle over top of cupcakes. Sprinkle with sea salt, and devour.

Altered from recipe found at tidymom.com


Wednesday, April 16, 2014

Deviled Eggs: Three Ways


One of my favorite Easter-time foods has always been deviled eggs - my grandma's recipe, of course. (It's normal to eat 10-15 in one sitting, right?)

However, with the help of Pinterest, other peoples' creative ideas, and binging on Chopped episodes, I have discovered a whole new world of deviled eggs. Apparently, deviled eggs can be whatever you want them to be. 


I was a little nervous to venture outside of my comfort zone, but these following recipes were a good different (much like Elsa). Enjoy these glamorized deviled egg recipes - though I can't promise they will be able to create beautiful ice castles and adorable snowmen (sorry, I can find a way to connect anything to Frozen).

Oh, and in case you're needing an easy way to get perfectly hard-boiled eggs, check this out.


Buffalo Chicken Deviled Eggs
(find original recipe here)
12 eggs, hard boiled
2 tbsp mayonnaise
1/4 c Frank's hot sauce
1/2 c shredded chicken
1/4 c carrot, finely diced
1/4 c celery, finely diced
2 tbsp onion, diced
1/4 c bleu cheese, crumbled
Salt & pepper, to taste

Cut each egg in half, and set aside whites. Mix together yolks, mayonnaise, hot sauce, chicken, carrots, celery, and onions. Scoop a heaping spoonful of the filling into each egg half. Sprinkle each egg half with bleu cheese & drizzle with extra hot sauce.


Bacon Cheddar Deviled Eggs
12 eggs, hard boiled
1/2 cup mayonnaise
1 tbsp mustard
1/4 c sharp cheddar
6 slices bacon, chopped
Salt & pepper, to taste

Start by frying the bacon until it's crispy (save the bacon drippings). Cut each egg in half, and set aside the whites. Leaving a handful of the bacon out to sprinkle over the top, mix together egg yolks, mayonnaise, mustard, cheese, bacon, and some of the bacon drippings. Mix in some of the bacon drippings to the filling.  Scoop a heaping spoonful of the filling into each egg half, and then sprinkle bacon over the top. 


Red Curry Deviled Eggs
(find original recipe here*)
12 eggs, hard boiled
1/2 c mayonnaise
1 tsp champagne or white wine vinegar
2 tsp Dijon mustard
1/2 tsp dry mustard
1/4 tsp cayenne pepper
1 tbsp red curry paste
Salt & pepper to taste
1/4 c fresh parsley or chives, chopped
Paprika

Cut each egg in half and set aside whites. Mix together the rest of the ingredients until throughly combined and smooth. Scoop into a pastry bag or large Ziploc bag, and pipe filling into each egg half. Sprinkle with paprika for extra color.

*This recipe was discovered during a Chopped-watching marathon. In Season 6, Episode 6, Lisa Garza spends all her time on a perfect deviled egg recipe. She literally gets no other basket ingredients on the plate, but the judges are so impressed by her deviled egg that she almost moves on. I thought, "That's a deviled egg recipe I'm gonna need to try."


Perfectly Hard-Boiled Eggs [the EASY way]


I've searched the Internet so many times for a simple way to get perfect hard-boiled eggs. I've read a lot of articles that included several complicated steps and dishes, and I thought, "Surely, there's a better way."

I'm not going to lie, I never attempted any of the complicated methods. My grandma taught me how to boil eggs, so I do it her way. Three simple steps, one dish.

1. Place eggs in a pot and cover with water (make sure no part of any egg is out of the water).

2. Bring water to a boil, and let boil for 10 minutes.

3. Cool the eggs (THIS is the most important step). I've found that the best way is to cool it down with water first (pour out hot water & fill pot with cold water & ice). Transport the eggs to the fridge & let sit in fridge for at least half an hour.

If your eggs are cooled enough, the shells will come off easily without damaging the egg white at all. To crack the shell (another trick my grandma taught me) - wrap the egg in a paper bowl or napkin, roll on a hard countertop until the egg is softly cracked all over, then peel - the shell will come off easily.


Saturday, April 12, 2014

Whole Grain Peach-Banana Muffins


It's about time this special ingredient debuted on my blog. 

That's right.

It's banana time.


In order to honor my blog's title, as well as my lifelong compulsory epithet, I'm going to be doing more banana recipes. After all, bananas are the fruit of life. (That statement may or may not be true, but it sounds cool.)

Whole Grain Peach-Banana Muffins
(adapted from recipe)

Muffins
1/2 c brown sugar
1/4 c real maple syrup
3/4 c peach yogurt 
2 very ripe bananas, mashed
1/4 c melted butter
1 egg, beaten
1/2 c steel cut oats
1 c flour
3/4 c whole wheat flour
2 tsp baking powder
1/2 teaspoon baking soda
2 tsp cinnamon
1/4 tsp salt
1 c ripe peach, chopped 

Topping
1/2 c chopped pecans
1/2 c whole wheat flour
1/4 c brown sugar
1/4 c butter, melted
1 pinch ground cinnamon

1. Preheat oven to 375 degrees. Coat muffin pan with non-stick baking spray, or use muffin liners. 

2. Mix together brown sugar, maple syrup, peach yogurt, bananas, butter, eggs, & oats until well blended. Allow mixture to sit so that the oats will soften - about 10-20 minutes. Combine dry ingredients in a separate bowl, then add to banana mixture, along with the peaches, until just combined. Fill each muffin cup about 3/4 of the way full. 

3. Mix together topping ingredients. Sprinkle over the top of each muffin until it is used up (you can be generous). Bake the muffins for 20-25 minutes, until a toothpick inserted in the middle comes out clean. 


Friday, April 11, 2014

[DQ Copycat] Ice Cream Cake


I've never been a fan of the out-of-the-box-mix cake with the store-bought frosting. When I was little and my mom would ask me what kind of cake I wanted for my birthday, I would always want an ice cream cake. And the best was when she would get me my very own custom-designed cake from Dairy Queen. Well, when I asked my brother what kind of cake he wanted this year, I recognized the look in his eye - he didn't want just any old birthday cake. "Ice cream cake?" I asked him. He didn't have to answer - I knew I was on the path to "favorite sister" status. Hence, my first experience making an ice cream cake began. Though it had its challenges, I hope my tips below will help you (or me next time) successfully execute a delicious and beautiful ice cream cake - DQ style.

[DQ Copycat] Ice Cream Cake
2 1&1/2 quart containers of ice cream, softened at room temperature (Vanilla & chocolate are the default, but you can use your favorite - you will do one layer of one flavor, and two of the other. You can even use three different flavors like I did, but you will have some left over. Darn.)
1 pkg Oreo cookies (I used the birthday cake flavor)
1 bottle chocolate shell ice cream topping
2 pints whipping cream
1/4 cup powdered sugar
4 tsp vanilla
Sprinkles for topping

YOU WILL ALSO NEED: one 9-inch springform pan, one very cold freezer, and at least 5 hours.

1. Put springform pan in the freezer for 15 minutes. The ice cream should be soft, but not melted. Pull the pan out of the freezer, and spread your first layer of ice cream on the bottom of the pan and up the sides of the pan (each layer should be about 1/2 inch thick). Put back in freezer for 45 minutes.

2. In the meantime, crush the Oreos. I did not use a food processor, as I wanted them to still be crunchy. I just put them in a Ziploc bag & used my hands to crush the cookies. Mix in the chocolate shell topping until cookie crumbs are moistened. Remove pan from freezer, and spread the next layer of the cake on top of the hardened ice cream. Crumble the Oreo cookie mixture over the second layer, and put back in freezer for about 1 hour.

3. After an hour, remove the pan and spread the last layer over the top. Smooth the top with a rubber spatula, and put back in the freezer for about 2 hours (or overnight).

4. Before taking the cake out of the mold, you will need to get the whipped cream ready. Whip together whipping cream, powdered sugar, and vanilla until the cream forms stiff peaks. Remove the cake from the freezer, and wipe the outside of the pan with a hot cloth. Run a knife around the inside of the pan, then remove the pan. If it is not frozen enough, stick it back in the freezer for 30-60 minutes. (Trust me, you do NOT want to try and frost a melting cake.)

5. Use a rubber spatula to quickly frost the outside of the cake. Do not waste time on this step - the cake will begin to melt if you take too long. Return to freezer for at least 20 minutes after frosting. Add your decorations. (If you need to cover up a messy frosting job on the sides, feel free to get creative. Oreos saved my cake.) Leave the cake in the freezer until ready to serve - then remove 15 minutes before serving.